Get started with the Events Calendar
With Stepsy Calendar you can organize your entire schedule, set up specific requirements for each class, and make it available for your members so they can start enjoying the benefits of their membership.
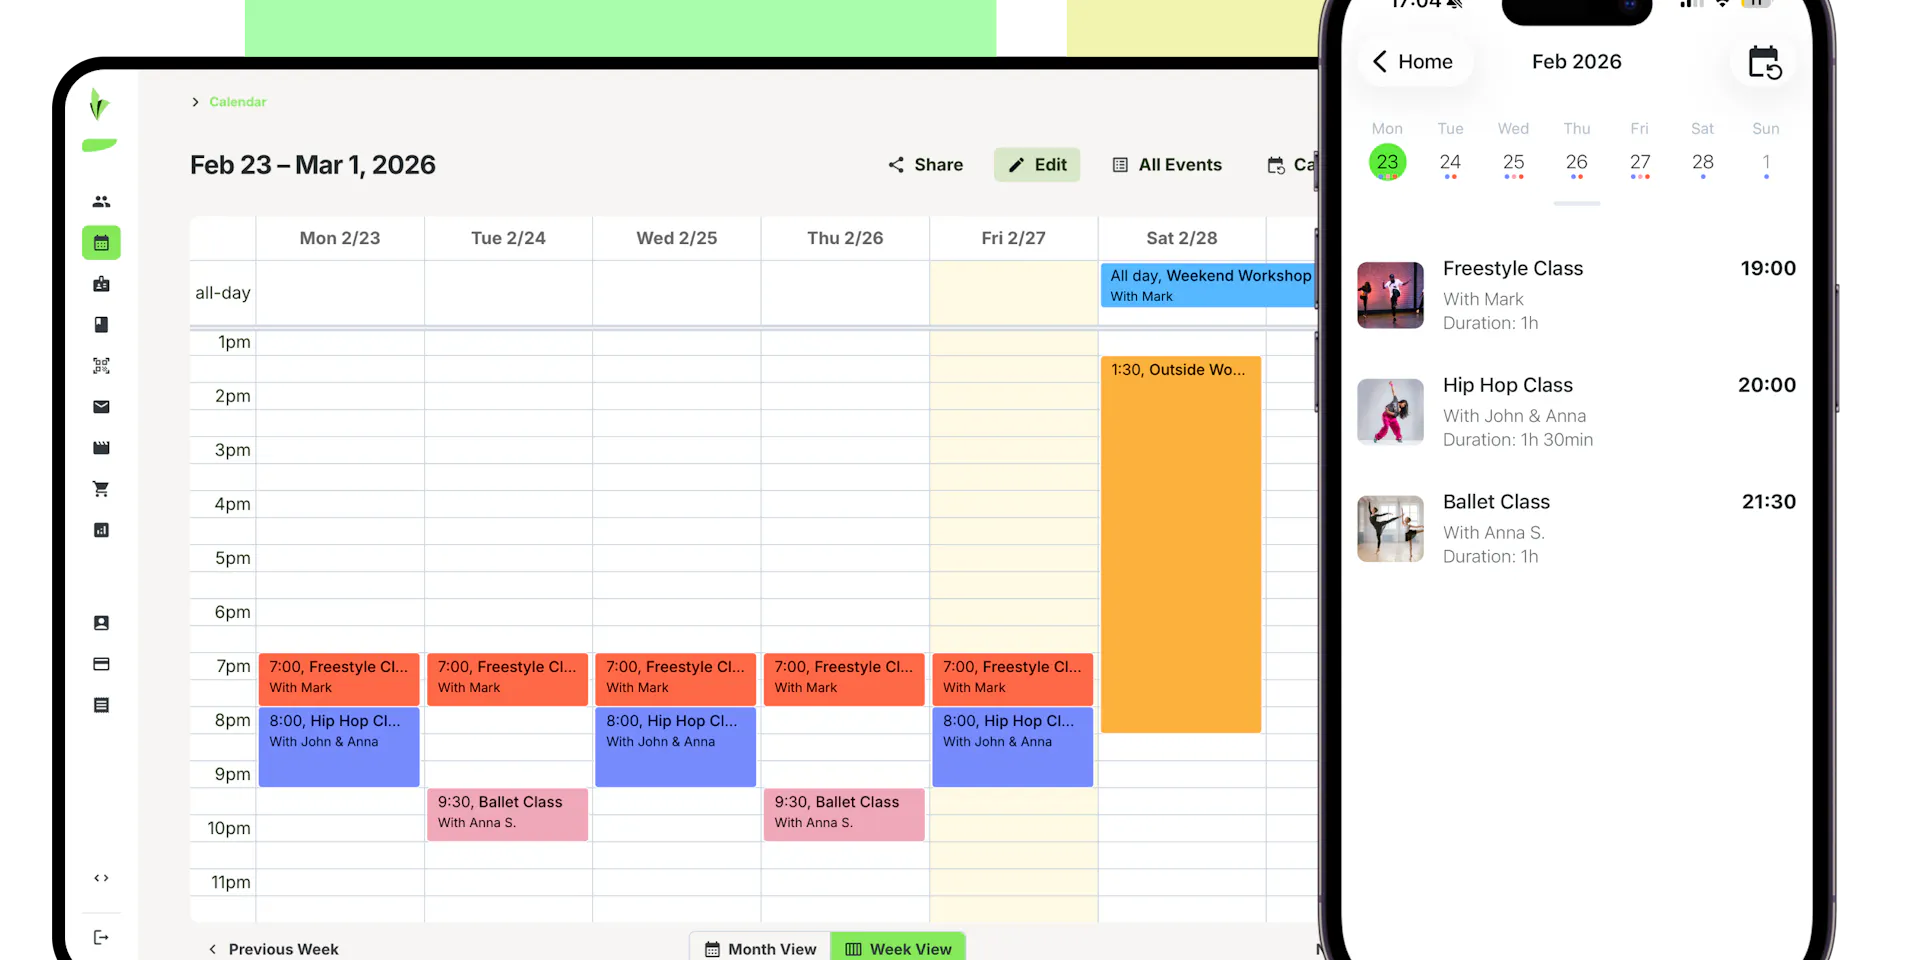
Create your first event
You can simply add a new event by clicking on any available slot in the Calendar or by going to Calendar > All Events section.
You should choose a title for your new event and a brief description followed by the most important part - setting up the time frame of your event.
In the time frame section you will have two options:
- One-Time Event - these are events that happen only once. You should select this option for special classes/workshops, parties, etc.
- Recurring Event - these events will repeat every week according to your selected day of the week and start/end hour times. You should select this option for your usual club activities.

Set the date, start & end time (skip this part for all-day events) for your event and click Save.
All the events added to your Calendar will appear in the Stepsy mobile app for your members.

Enable Bookings
You can enable booking for any created event by going to the Bookings tab. There are two types of booking options:
- Capacity Bookings - members can reserve a spot for the entire duration of the event.
- Interval Bookings - members can reserve a time slot during the event. You can customize the duration of the time slot.

Booking use by default a first-come, first-served logic, but you have the option to enable approvals and then each booking will remain pending until they are accepted or declined by the Admin.
Tips and Tricks
- Drag and drop freely any event on the Calendar to modify its duration or start date.

- Right-click on any event to reveal the copy-paste option.

Head over to Stepsy Calendar and give a try to all these cool features and create new events in seconds!
In this articleCreate your first eventEnable BookingsTips and Tricks
Join our monthly newsletter
The latest insights on today's world of work straight to your inbox.